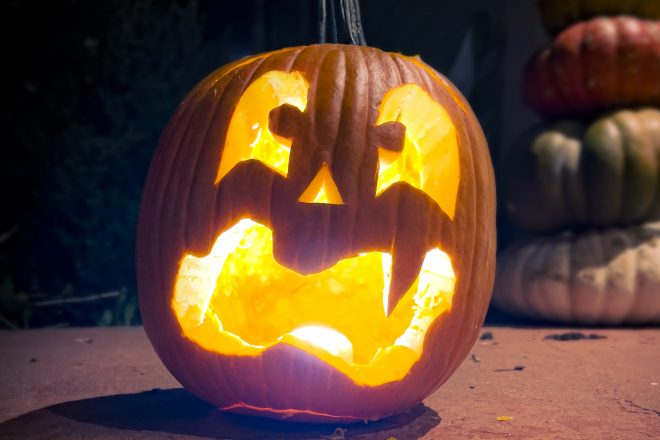
Carving Pumpkins Is an Art
- Share
- Tweet
- Pin
- Share
Carving pumpkins is incredibly simple. So simple, in fact, that we tend to forget the little things that make the process even easier or inject some extra creativity and craftsmanship into it. Here are some tricks – with the treat of a better creation at the end – that I’ve found to up your jack-o’ game this Halloween.
Tools of the Trade
Take the little cutting tools that come in the blister pack at the dollar store and throw them in the trash. Adults use power tools. (If you’re not an adult, please ask one to help you with your pumpkin carving. Safety first.)
Mark your cuts with a dry-erase marker; then use a jigsaw to make quick work of your designs. This method is ideal if you want to make a lot of jack-o’-lanterns all at once, but it’s not as good at the detail work. For that, invest in a pad saw.
The Three Kinds of Cuts
Before you jump in, it’s important to know how you’re going to produce your final image. There are three main ways in which your artistry will show through – literally and figuratively – and you need to decide up front which will be most effective for your piece.
When you cut a design into a pumpkin, the light shining from inside will create the image. If you’re making a jack-o’-lantern face, this is the way to go.
If your image is more complex and will incorporate background elements, then your cuts should be creating negative space. That way, the silhouette created by the parts of the pumpkin left intact will create the image.
Finally, for detailing, there’s shaving. Pumpkin carving typically creates two values: fully light and fully dark. To create translucent shades in between, the pumpkin must be shaved down. The more that’s shaved away, the more light will shine through.
Bottom’s Up
The first step is cutting a hole through which to scoop out the insides. Traditionally, folks tend to cut the top off the pumpkin, but if you opt to remove the bottom instead, you’ll find that everything else comes more easily.
First of all, the intact stem acts as a handle by which to grip the pumpkin, and second, it’s much easier to scoop out the goop from the bottom with gravity on your side. Plus, when you add your lighting source at the end, you don’t have to drop it in from the top, which can be tricky or even dangerous. You just place the lighting source on a flat surface, and lower the pumpkin into place from above.
It’s All in the Lighting
Discreet lighting has come a long way since I was a kid. If you find your little tea light or votive candle sorely lacking in power inside your finished jack-o’-lantern, try some LEDs. Battery-operated, Bluetooth-enabled light pucks are cheap and easy to come by, and not only are they brighter than a candle, but they come in different colors and can be set to flicker like a flame, or strobe, or anything else you can think of.
If you do go with a traditional candle, sprinkle some cinnamon inside the pumpkin. You’ll thank me when your front porch smells like pumpkin pie.
Keep It Gourd-geous
Did you keep the stem connected to the big gourd? Great! That means your jack-o’-lantern is well on its way to a longer season. The stem continues to supply nutrients to the pumpkin after it’s been removed from the vine, so an intact stem will fend off the rot a bit. To preserve your creation even longer, spray the outside with white vinegar and lemon juice.
I hope these tips help you to make your jack-o’ art faster, more detailed and longer lasting than ever before. Now get out there and carve yourself a masterpiece.